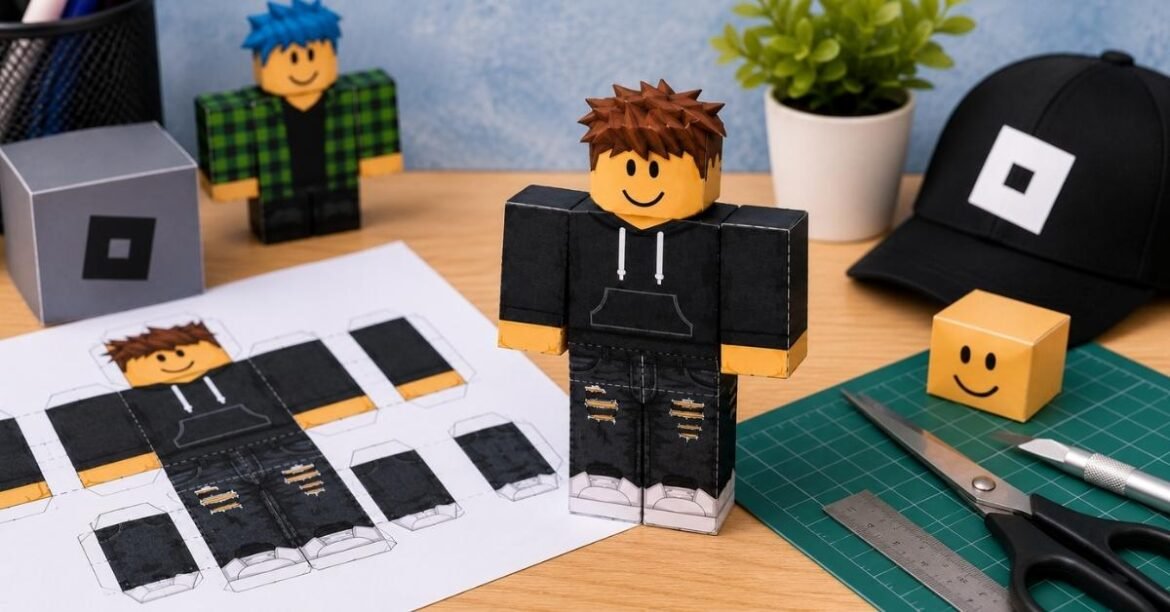
I tried Roblox papercraft, and it was amazing! Here are 5 brilliant steps to build your own 3D avatar using a template and basic craft supplies.
Introduction
My nephew has been obsessed with Roblox for as long as I can remember. He talks about his avatar the way other kids talk about their sports teams — with fierce pride, endless customization opinions, and a deep personal investment in every cosmetic detail. So when I discovered the world of Roblox papercraft, I knew immediately that we had to try it together. Watching his face light up as his blocky paper character took shape on the dining table was honestly one of the most joyful afternoons we have shared.
What surprised me most about Roblox papercraft was how accessible and genuinely engaging it is for kids of all ages. You do not need any special artistic training or expensive supplies to get started. All you need is a printed template, a handful of basic craft materials, and a little patience. Today, I want to walk you through everything I learned so your family can recreate that same magic at home.
The beauty of bringing a digital avatar into the physical world is the way it bridges two very different kinds of creativity. In the game, kids design their characters by selecting outfits, accessories, and colors on a screen. With Roblox papercraft, that digital creativity becomes tactile — they get to color, cut, fold, and assemble something they can actually hold. It is a wonderful reminder that creativity does not always have to live behind a screen.
Why Roblox Papercraft Is Perfect for Kids
Before I dive into the steps, I want to talk about why I love this activity so much from an educational standpoint. Paper crafts develop fine motor skills, patience, and spatial awareness in children, all while feeling like pure play. When you combine that with the motivating subject matter of a beloved video game character, the engagement level is extraordinary. My nephew stayed focused and enthusiastic for the entire two-hour session, which is genuinely remarkable for an eight-year-old.
Roblox papercraft is also a fantastic screen-time alternative that still connects children to something they are passionate about. Rather than fighting the pull of the game, this activity channels that enthusiasm into hands-on making. Parents can sit alongside their kids and participate meaningfully without needing to understand the game itself. It is a gentle, creative bridge between the digital world children love and the analog world of traditional crafting.
From a budgeting perspective, this activity is wonderfully affordable. The main cost is a single sheet of cardstock paper per character, which can be printed at home for just pennies. The remaining supplies — scissors, glue, markers, and tape — are items most families already have on hand. This makes Roblox papercraft an ideal rainy-day project that delivers enormous creative satisfaction without requiring a trip to a craft store.
Supplies You Will Need
Getting set up before you begin saves a lot of frustration mid-project. I learned this lesson the hard way when we had to pause halfway through to hunt down a glue stick. Here is everything I recommend gathering before you sit down to start your Roblox papercraft session.
| Supply | Purpose | Notes |
| Cardstock paper | Sturdier than regular paper, holds its shape when folded | Print the template directly onto this |
| Scissors | Clean, precise cuts along the template lines | Small craft scissors work best for curves |
| Markers or colored pencils | Customizing the outfit design | Color before cutting for best control |
| Glue stick or craft glue | Assembling the folded 3D body parts | Glue stick is cleaner for kids |
| Tape | Reinforcing tabs that are difficult to glue | Especially helpful on the smaller limbs |
| Ruler | Scoring fold lines for cleaner edges | Makes a dramatic difference in the final look |
| Bone folder (optional) | Professional-quality sharp creases | Not essential but helps enormously |
Using cardstock rather than regular printer paper is probably the single most impactful upgrade you can make to the quality of your finished Roblox papercraft character. Regular paper flops and bends under its own weight once assembled, while cardstock holds a rigid, satisfying three-dimensional form. Most home printers handle cardstock perfectly well, so this is an easy swap.
Step 1: Design Your Outfit Before You Print
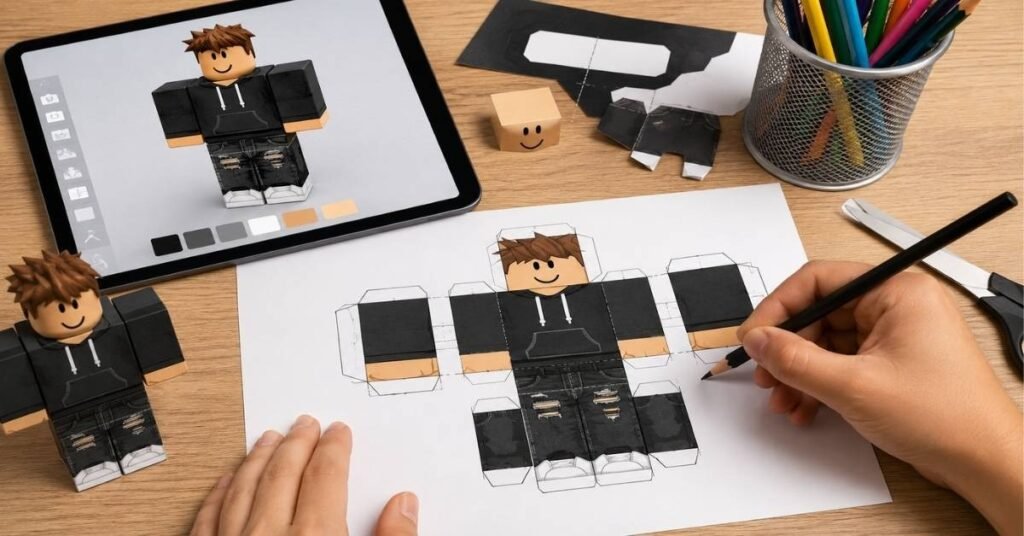
The most exciting part of the entire Roblox papercraft process is designing your avatar’s unique outfit. The flat template features all the body parts of the classic blocky Roblox character laid out separately — the torso, the head, both arms, and both legs. This is your blank canvas, and the goal is to fill it with a design that matches your in-game avatar or reflects your personal style.
I recommend sketching your design ideas on a piece of regular paper first before committing to the final cardstock version. Think about the clothing your avatar usually wears, including any patterns, logos, or color combinations. My nephew decided to recreate his in-game outfit, which featured a red and white striped shirt and blue jeans. The process of translating those digital clothes into hand-drawn designs taught him a surprising amount about proportion and scale.
When designing the face for your Roblox papercraft avatar, keep it simple and bold. The classic Roblox face features two square eyes and a simple mouth — but you can customize the expression by adjusting the shape and placement. A wider mouth creates a cheerful grin, while angled eyebrows can convey determination or mischief. Sticking to bold outlines and flat color blocks rather than fine detail is the best approach for the scale of the face panel.
Step 2: Color All the Panels
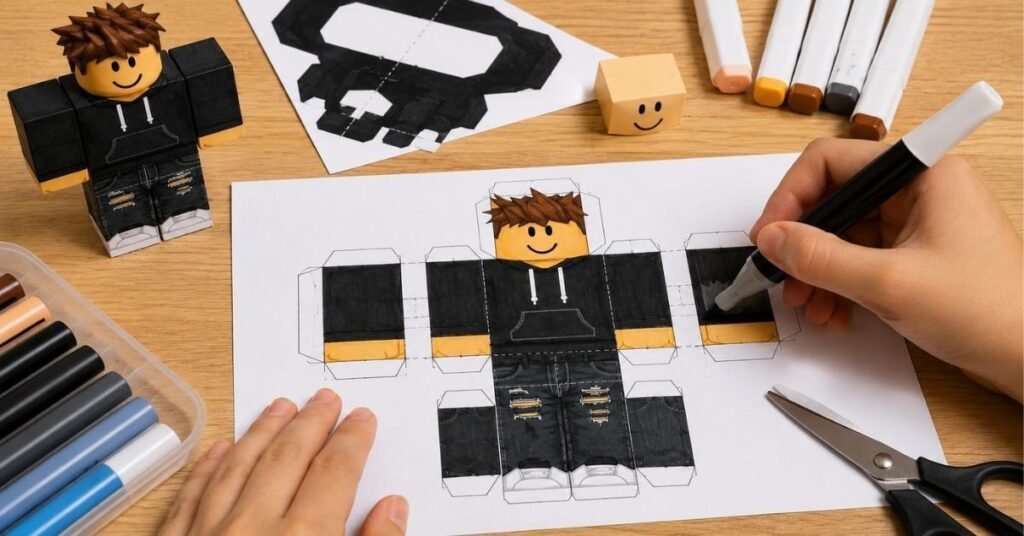
Once your design is planned and your template is printed, coloring each panel before you cut is the smart approach. Working on a flat, intact sheet gives you full control over the markers without accidentally tearing a panel that has already been cut out. Take your time with this step because the coloring quality will define how impressive the finished Roblox papercraft character looks when assembled.
I use a combination of fine-point markers for outlines and broader chisel-tip markers for filling in large areas. Colored pencils are a wonderful alternative if you prefer a softer, more textured look — they also layer beautifully if you want to create shading effects on the clothing. Encourage kids to press firmly and color in one direction for the cleanest, most even coverage. This step alone can take thirty to forty-five minutes, and that is perfectly normal.
One creative idea I love for the Roblox papercraft coloring stage is using metallic markers for accessories like armor, weapons, or golden highlights on the outfit. My nephew added gold trim to his avatar’s sneakers, and it made the finished figure look genuinely custom and polished. Do not be afraid to experiment — part of what makes this activity so special is that each child’s result is unique to their creative vision.
Step 3: Score and Cut the Template
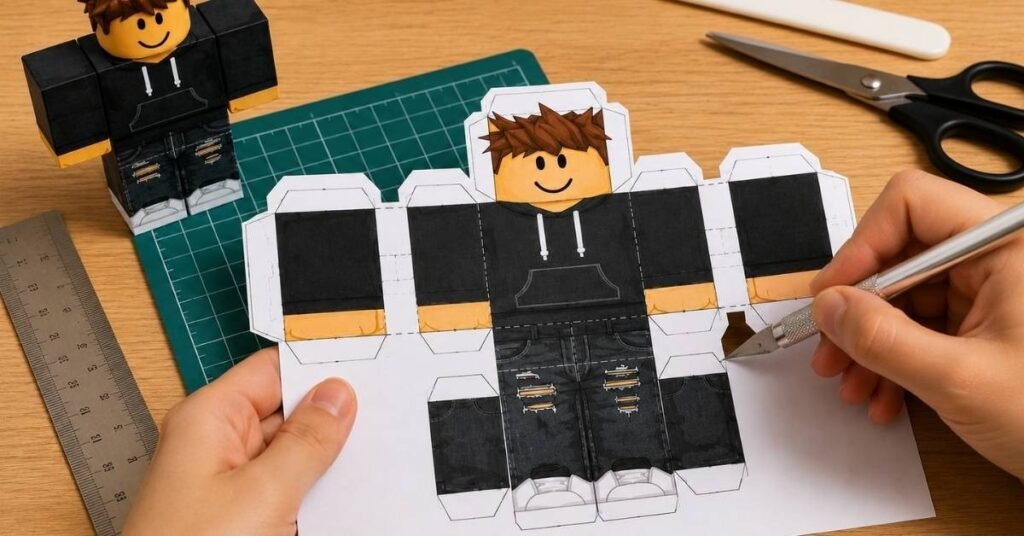
After coloring is complete, it is time to carefully score and then cut out each panel. Scoring means using a ruler and a dull object like the back of a butter knife or a bone folder to press firmly along every fold line before cutting. This creates a compressed crease in the paper fibers that makes folding much crisper and cleaner. Skipping the scoring step is one of the most common mistakes beginners make with Roblox papercraft, and it results in ragged, untidy folds.
Cut along the outer edges of each panel using clean, steady cuts. For straight edges, use scissors in one continuous motion rather than multiple short snips. For any rounded corners, rotate the paper slowly as you cut to maintain a smooth curve. Take your time — rushing this step leads to wavy cuts that compromise the look of the finished Roblox papercraft character.
Keep all the cut pieces organized in a small pile as you work. With multiple body parts — head, torso, two arms, two legs, and sometimes accessories — it is easy for pieces to get mixed up or accidentally discarded. Laying them out in a rough human shape on the table as you cut each one helps you keep track of progress and builds excitement as the character starts to take form.
Step 4: Fold and Assemble the 3D Shape
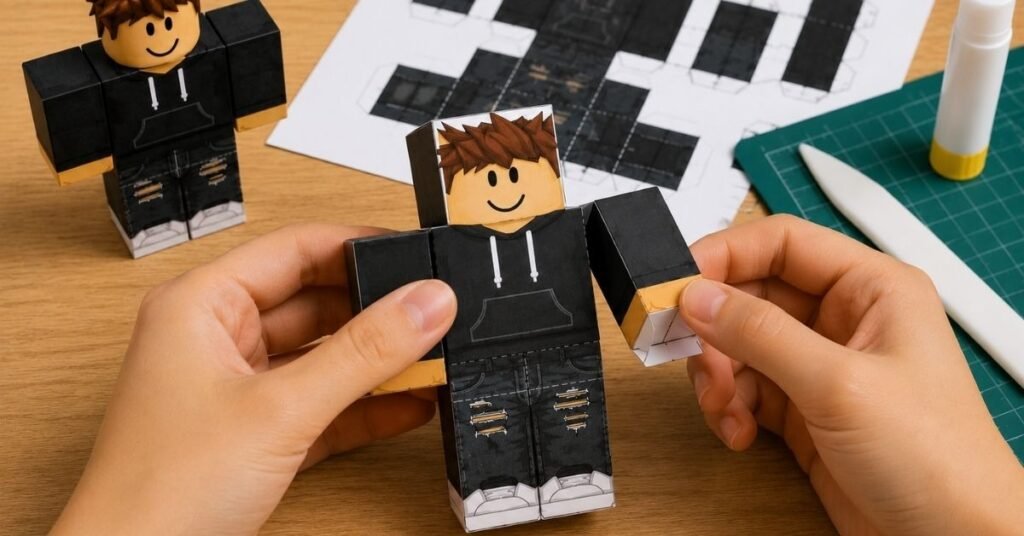
This is the most satisfying step in the entire Roblox papercraft process — watching flat panels transform into three-dimensional body parts right before your eyes. Each panel has a series of dotted or dashed lines that indicate fold directions. Mountain folds go up, and valley folds go down, and following these correctly is essential to getting the shapes right.
Start by folding the largest piece — the torso — first. Fold along every scored line before applying any glue to get a feel for how the box shape comes together. Once you understand how the tabs tuck into adjacent edges, apply glue or tape to each tab and hold it firmly in place for thirty seconds before moving on. Building from the body outward — attaching the head first, then the arms and legs — gives the Roblox papercraft figure structural stability as it grows.
The arms and legs are the trickiest parts because they are small and the tabs are narrow. This is where clear tape becomes your best friend. If a glued tab refuses to hold on a small limb, a tiny strip of tape on the inside of the joint provides invisible reinforcement. I also recommend using a toothpick or a pencil tip to press tabs firmly into corners that your fingers cannot easily reach.
Step 5: Display and Customize Your Creation
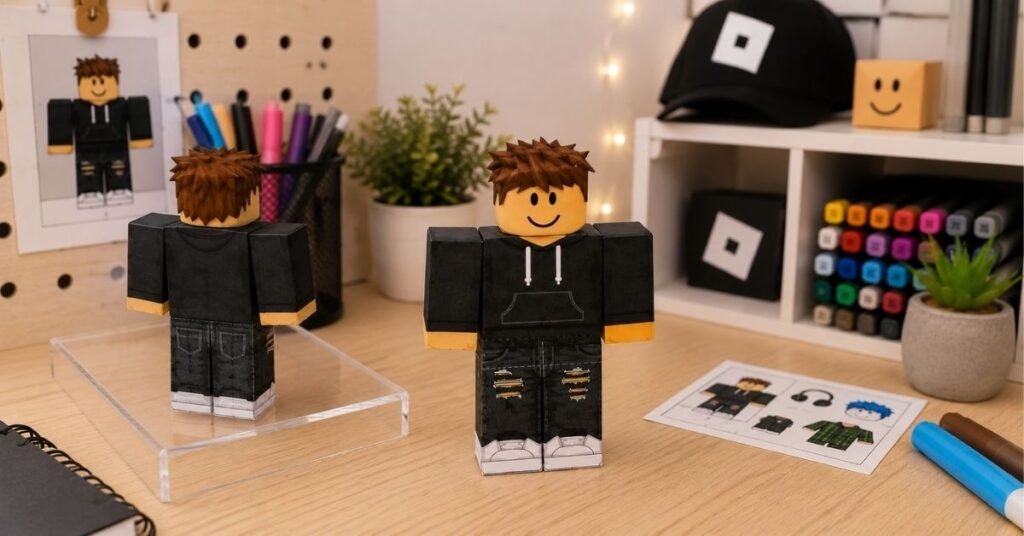
Once fully assembled, your Roblox papercraft avatar is a genuinely impressive little figure that deserves a proper display. My nephew immediately placed his on his bookshelf next to his favorite books and a few of his other toys. He was so proud of it that he brought three of his friends over specifically to show it off the following day. That pride of ownership — in something handmade — is something that a digital item simply cannot replicate.
You can take your Roblox papercraft customization even further by adding paper accessories after assembly. Small paper swords, backpacks, hats, or wings can be cut from leftover cardstock and glued or taped onto the figure. Some crafters even create miniature paper furniture and environments so their avatars have a little scene to stand in, essentially turning one Roblox papercraft character into an entire imaginative diorama. The creative possibilities extend far beyond the initial build.
Tips for Success
To close, here are my most important personal tips for making your Roblox papercraft project a genuine success:
- Always use cardstock, not regular printer paper, for a sturdy finished figure.
- Color before cutting to maintain full control over your design.
- Score every fold line with a ruler and a dull edge before folding for crisp, clean creases.
- Build slowly — rushing the gluing steps leads to warped, lopsided figures.
- Use tape as backup for any joints that refuse to hold with glue alone.
- Customize freely — there is no right answer when it comes to avatar design.
The most important thing is to enjoy the process rather than obsessing over a perfect result. Every Roblox papercraft figure turns out a little different, and that imperfection is part of what makes handmade things special.
FAQs
1. Where can I find a free Roblox papercraft template?
Free printable templates are available on several educational and gaming craft websites. You can search specifically for “Roblox papercraft avatar template PDF” to find printable versions. iD Tech and other similar platforms often offer free downloadable versions designed for home use.
2. What age group is Roblox papercraft best suited for?
This activity works wonderfully for children aged six and older, though younger kids benefit from adult help with cutting and folding. Older children and teenagers often enjoy adding complex custom designs to their outfits independently. Even adults find the assembly process meditative and satisfying.
3. Can I make multiple characters for a Roblox diorama?
Absolutely — making multiple Roblox papercraft figures is a fantastic way to expand the activity. You can recreate an entire squad of characters from a favorite game, each with their own unique design. Arranging them in a scene together makes an impressive display piece for a bedroom or gaming space.
4. What kind of glue works best for this project?
A glue stick is the cleanest and easiest option for children because it dries quickly and does not create messy drips. For older kids or adults who want stronger bonds, a small amount of white PVA craft glue applied with a toothpick works beautifully. Avoid liquid super glues, which set too fast and can bond fingers together.
5. Can I use regular printer paper if I do not have cardstock?
You can use regular paper, but the finished figure will be much floppier and less durable. If cardstock is not available, printing two copies and gluing them back-to-back before cutting gives you extra thickness and rigidity. A craft or office supply store will carry cardstock, which is inexpensive and readily available.

With over 5 years of hands-on experience in the creative arts, I have turned my passion for DIY and home styling into a mission to inspire others. As the lead creator at UnboxTreats, I specialize in the fine details of paper crafting, yarn work, and artisanal candle making. I test every craft and decor trend to ensure you get only the most reliable and creative advice for your home.