
Learn how to build a papercraft sculpture with safe and professional techniques to create stunning 3D geometric art in your home in 2026.
The Artistic Foundation of Modern Papercraft
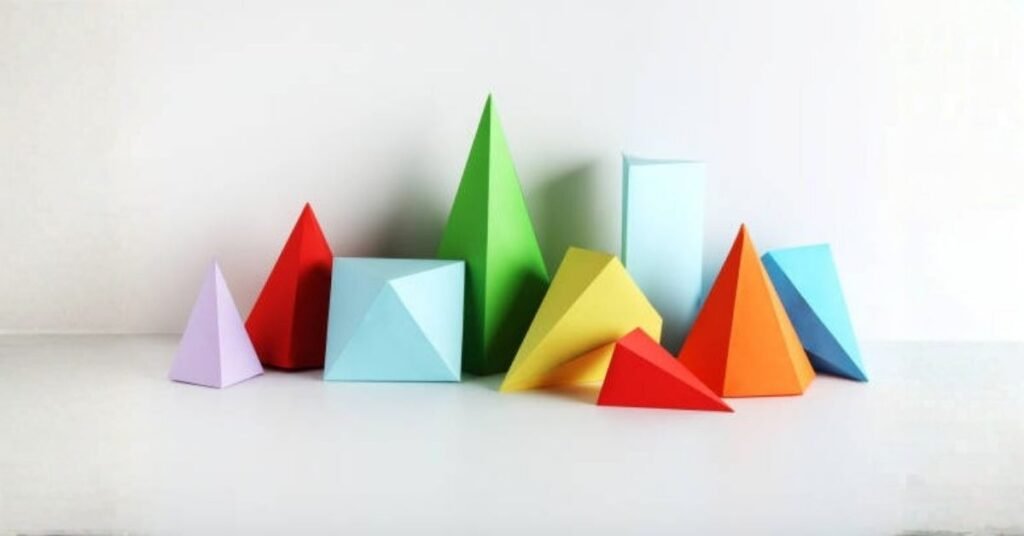
Starting a project in papercraft sculpture requires a basic understanding of geometry and spatial awareness to achieve professional results at home today. By using heavy cardstock, you can create structural forms that mimic the aesthetic of expensive low-poly digital art and modern gallery decor for your office.
The beauty of a handcrafted project lies in its accessibility, as it only requires a few simple tools and a bit of patience to finish. Whether you are creating a geometric animal head or an abstract shape, the process remains a calming and tactile creative outlet for any modern artist.
As you explore the world of 3D modeling, you will find that different paper weights significantly impact the stability of your finished professional model. Choosing a weight between 180 and 250 gsm ensures your art remains rigid enough to hold its complex structural shape over a long time.
Integrating a papercraft sculpture into your home office or living room adds a unique, handcrafted element to your personal interior design style this year. Each fold and glue tab contributes to a finished piece that looks professionally manufactured despite being made entirely of simple sheets of heavy paper.
Essential Tools for Precision Assembly
Achieving a clean finish on your artwork depends heavily on using the right precision tools for cutting and scoring your cardstock during the build. A sharp hobby knife and a metal ruler are indispensable for creating the crisp, straight lines that define high-quality geometric art for your collection.
Must-Have Papercraft Equipment
- Precision Craft Knife: Essential for cutting intricate tabs and small geometric details without fraying the edges of your heavy cardstock paper during the process.
- Scoring Tool: Used to create clean indentations along fold lines, ensuring your papercraft sculpture has professional, razor-sharp corners every time you fold a piece.
- Quick-Dry Adhesive: A high-tacky glue prevents the paper from warping and allows you to build complex vertical structures without long waiting periods for the bond.
Using a self-healing cutting mat protects your workspace and keeps your blade sharp throughout the long duration of a complex paper build at home. These small investments in quality tools will prevent the frustration of torn paper or messy glue spills on your final project during the assembly phase.
The assembly of a 3D model is a rhythmic process of scoring, folding, and gluing that rewards steady hands and a very focused mind. By taking your time with each individual piece, you ensure the final alignment of the model is perfectly symmetrical and ready for a display.

Mastering Folds and Structural Integrity
The structural strength of a papercraft sculpture is derived from the tension created by mountain and valley folds throughout the interior skeleton of paper. Understanding how these folds interact allows you to build larger models that can support their own weight without collapsing or bending during the process.
| Fold Type | Visual Marker | Purpose in Sculpture |
| Mountain Fold | Dashed Line | Creates an outward peak for external details |
| Valley Fold | Dotted Line | Creates an inward trough for depth and texture |
| Hidden Tab | Solid Outline | Provides the surface area for the adhesive bond |
When building a large model, start from the most detailed area and work outward to ensure you have enough space for your fingers. This logical approach prevents you from becoming trapped by small tabs that are impossible to reach once the paper model is closed and finished.
Reinforcing the interior of your papercraft sculpture with additional strips of cardstock can provide extra durability for permanent wall-mounted displays in your home this year. This technical addition ensures your art remains pristine and resists sagging over several years of display on a gallery wall.
Developing your skills in manual construction requires practice with different textures and finishes of paper to see how they react to the strong glue. Pearlescent or metallic cardstocks can give your finished model a high-end look that resembles cast metal or polished ceramic art in your living room.
Advanced Finishing and Display Techniques
Once you have completed the assembly of your model, applying a protective coating can enhance its appearance and protect it from high levels of humidity. A light spray of matte or gloss varnish seals the paper fibers and helps the colors remain vibrant over a long period.
Pro Finishing Strategies
- Edge Inking: Use a matching felt-tip marker to hide the white edges of the paper for a seamless and professional monochromatic look on your model.
- Internal Lighting: Adding LED strips inside a hollow papercraft sculpture creates a stunning glowing effect that highlights every geometric facet and sharp fold line.
- Mounting Boards: Secure your finished art to a wooden base or a shadow box to provide a sturdy foundation for gallery-style presentation in your home.
The selection of a display location for your artwork should consider light and shadow to emphasize the 3D planes of the paper model. Placing the sculpture near a window or under a spotlight will create dramatic shadows that make the geometric form pop for your visitors.
Always handle your papercraft sculpture with clean, dry hands to avoid leaving oils or smudges on the delicate surface of the cardstock paper today. Maintaining a clean environment during and after construction is the best way to preserve the professional quality of your handcrafted geometric paper art.
Building Your Papercraft Community
Sharing your progress on a model through online forums or social media is a great way to connect with other local paper artists. The global community often shares free templates and technical advice that can help you overcome difficult structural challenges in your own complex paper builds.
Participating in a monthly challenge encourages you to try new styles, such as architectural models or complex wearable masks and sets of paper armor. These projects push the boundaries of what is possible with paper and help you refine your technical cutting and folding skills for the future.
Using a digital template for your papercraft sculpture allows you to scale the model to any size, from a miniature desk ornament to statues. This versatility makes papercraft a perfect medium for both beginners and experienced artists looking for a new creative challenge for their portfolio this year.
Be mindful of the paper grain when printing your templates, as folding against the grain can sometimes cause the fibers to crack or peel. Aligning your folds with the natural direction of the paper will result in a much smoother and more professional finish for your sculpture.
Refining the Assembly Workflow
The assembly of a papercraft sculpture can be streamlined by organizing your pieces by number or by color before you begin the gluing process. This methodical preparation reduces the chance of misplacing a critical structural component while you are working on the internal frame of the art.
By grouping similar geometric shapes together, you can apply glue to several tabs at once, which speeds up the construction time for the model. This efficiency allows you to focus more on the precision of the folds rather than the logistics of finding the next paper piece.
Maintaining a clean workstation is vital for any papercraft sculpture because even a small amount of dust can interfere with the adhesive bond strength. Wipe down your cutting mat frequently to ensure your cardstock stays pristine and the final surface of the model remains totally flawless.
Furthermore, using a pair of tweezers for the smallest tabs will give you the control needed for complex areas like facial features or claws. This professional touch is what separates a beginner project from a high-quality papercraft sculpture that is suitable for display in a gallery.
Material Selection and Sourcing
The choice of cardstock is the most critical decision you will make before starting your journey into the world of professional paper construction today. Look for acid-free papers that will not yellow or become brittle over time, ensuring your artwork survives for many years in your collection.
Specialty papers with linen or canvas textures can add a sophisticated layer of depth to your papercraft sculpture without requiring additional paint or finishes. These materials catch the light differently and can make a simple geometric form look like a much more expensive piece of art.
Sourcing your materials from local art supply stores or specialized online retailers ensures you have access to the best colors and paper weights. Having a diverse palette of cardstock on hand allows you to experiment with color blocking and gradients in your next papercraft sculpture.
If you are working on a budget, you can often find high-quality paper scraps at local print shops that are perfect for smaller builds. This sustainable approach to art allows you to practice your skills in papercraft sculpture while reducing waste and saving money on materials.
Conclusion
In conclusion, the art of papercraft sculpture is a perfect blend of digital precision and traditional craftsmanship that anyone can enjoy at home today. By mastering the basic techniques of cutting and folding, you can create impressive art that rivals expensive store-bought geometric decor for your house.
The ability to turn a simple stack of paper into a complex papercraft sculpture provides a deep sense of accomplishment and creative satisfaction for you. Whether you are building for relaxation or for exhibition, the possibilities of this versatile medium are truly endless for any modern artist.
As you continue to refine your skills, your projects will become more ambitious, allowing you to explore intricate details and larger structural paper forms. Embrace the process, stay patient with every tab, and enjoy the transformative power of working with your hands on a papercraft sculpture.
Frequently Asked Questions
How long does a papercraft sculpture take?
The time required for a papercraft sculpture depends on the complexity of the template and your experience level with cutting and scoring paper today. A small geometric animal may take three hours, while a large, detailed architectural model could require twenty hours of focused assembly time.
What is the best glue for papercraft?
For a papercraft sculpture, a fast-drying tacky glue or a high-quality white glue is best because it provides a strong bond without warping. Avoid using standard glue sticks or watery office glues, as they lack the structural strength needed to hold vertical cardstock planes together.
Can I use regular printer paper?
While you can practice on thin paper, a successful papercraft sculpture requires cardstock between 180 and 250 gsm for proper structural integrity and strength. Regular 80 gsm printer paper is too flimsy to support the weight of a 3D model and will likely collapse.
How do I fix a mistake in folding?
If you make an incorrect fold in your papercraft sculpture, try to gently flatten the paper and re-score the correct line on the opposite side. Minor creases can often be hidden by inking the edges or by carefully positioning the glue tabs to pull the paper into alignment.
Is papercraft sculpture a good hobby?
Yes, papercraft sculpture is an excellent hobby for improving fine motor skills, spatial reasoning, and patience while creating beautiful physical art for your home. It is an affordable way to explore 3D design and modern geometric aesthetics without needing expensive sculpture equipment.
With over 5 years of hands-on experience in the creative arts, I have turned my passion for DIY and home styling into a mission to inspire others. As the lead creator at UnboxTreats, I specialize in the fine details of paper crafting, yarn work, and artisanal candle making. I test every craft and decor trend to ensure you get only the most reliable and creative advice for your home.
")

")


")
